Introduction
Zelda-like Tutorial for Godot 4.0 - Player Movement and Animation - YouTube
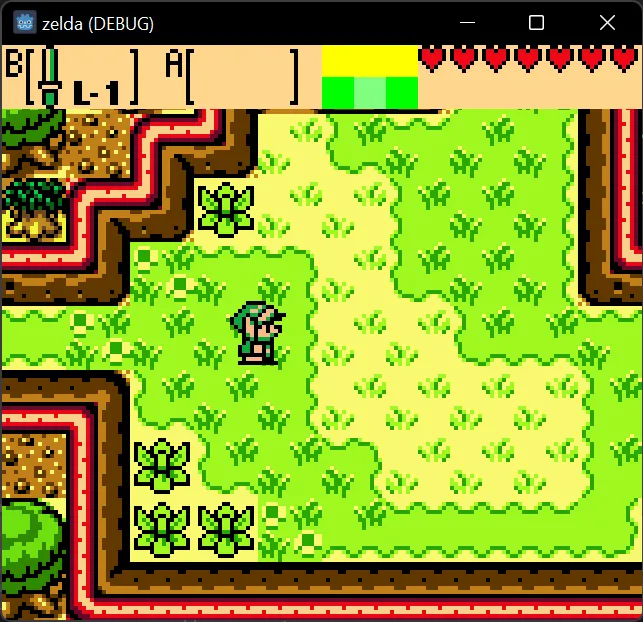
Hello! This is the first installment of my Zelda-like tutorial series for Godot 4. Throughout this series I will explain how to create a Zelda game from scratch. This tutorial is intended for those with some experience programming. This first tutorial covers basic 8-direction character movement in a 2D top-down perspective.
I am using Gameboy-inspired graphics drawn by TheRetroDragon. All assets are available to download for those wishing to follow step-by-step. The information itself is applicable whether you use the sprites or not.
Project Setup
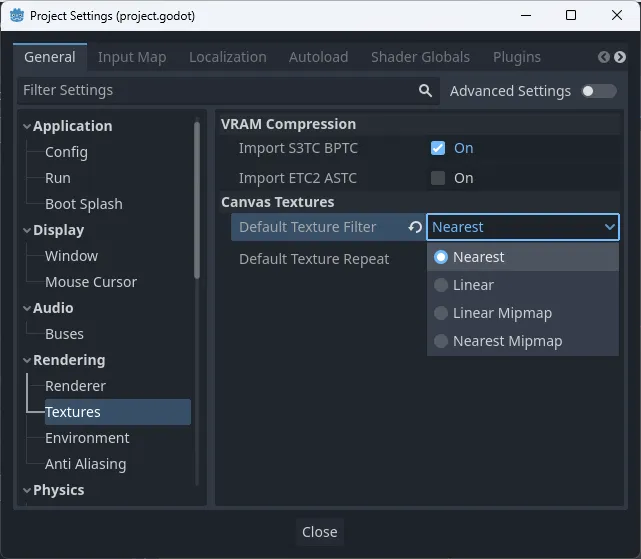
Start with a new Godot project using the Compatibility renderer. Select Project>Project Settings… in the top-left menu bar. Since we’ll be using 2D pixel art, we need to turn off the linear filtering on textures so our sprites do not look blurry. Set General>Rendering>Textures>Canvas Textures>Default Texture Filter from “Linear” to “Nearest”.
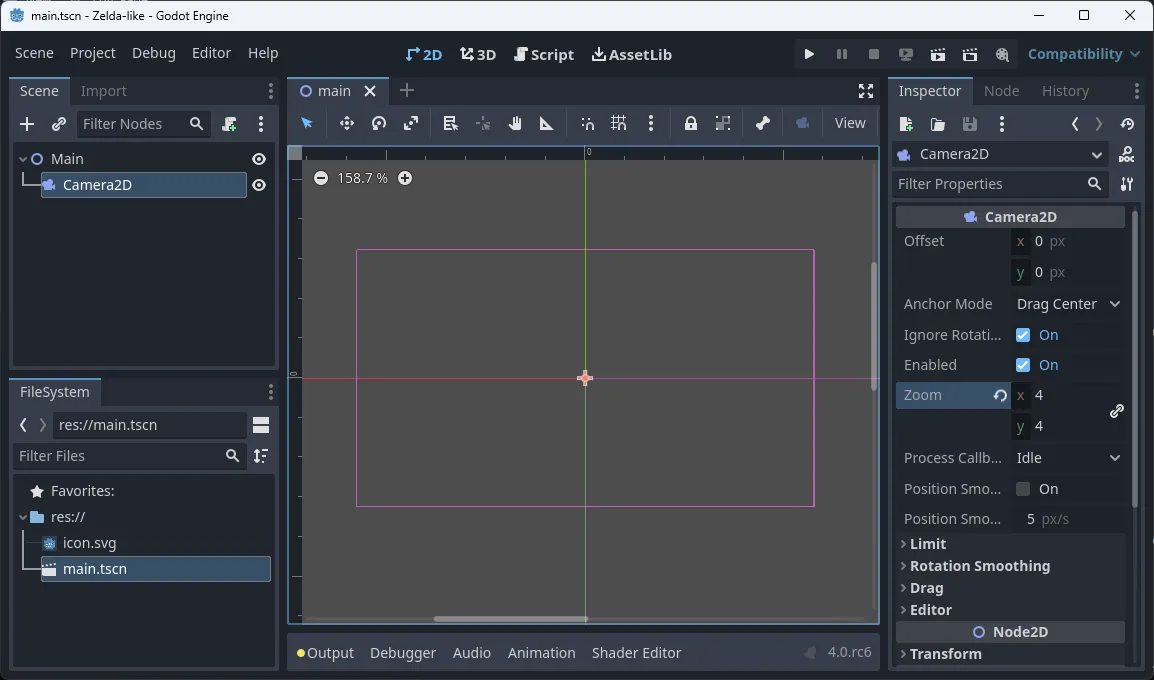
Now let’s create an empty scene with a camera. The root will be a Node2D that we will name “Main”. Add a Camera2D node and set its Zoom parameters to 4. Save the scene as “res://main.tscn”.
Player Scene
CharacterBody2D and CollisionShape2D
Create a new scene. The root node will be a CharacterBody2D. We’ll use this type for any object that can move and has collision. Name it “Player” and save the scene as “res://player/player.tscn”.
Look at the Inspector pane at the right of the window. By default the Motion Mode is set to “Grounded” for platformers with downwards-facing gravity. Set it to “Floating” for top-down perspective movement.
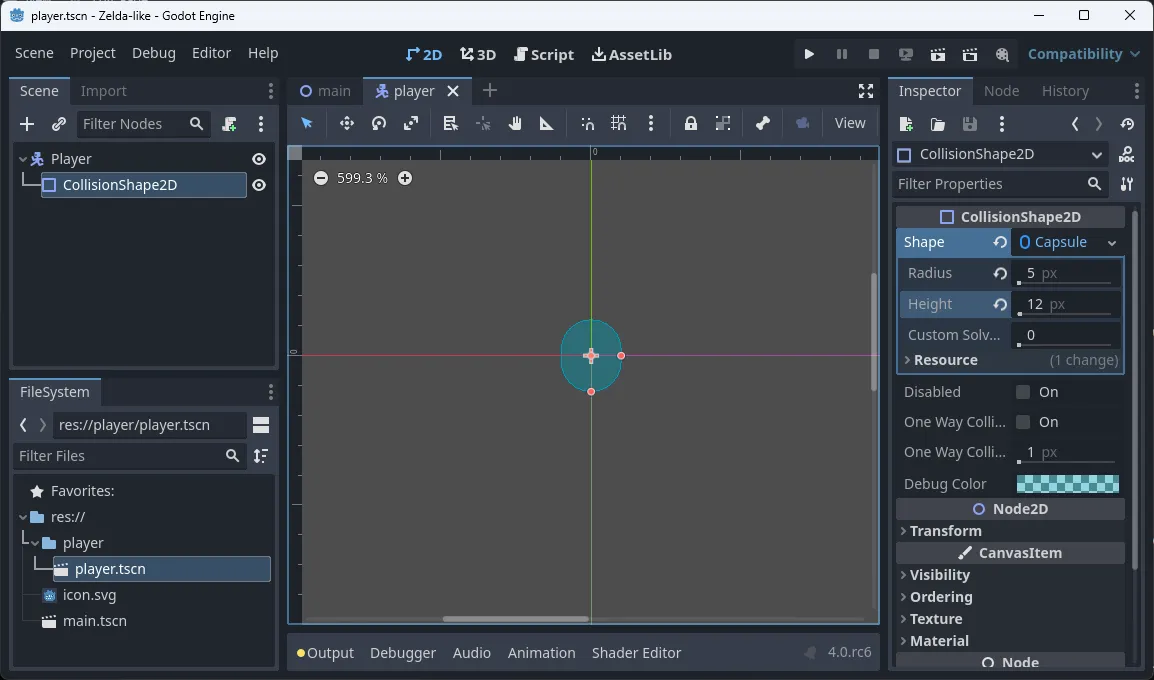
Add a CollisionShape2D as a child node. We will use this node to define the shape our character will have when it collides with other bodies. It does nothing by itself; it needs a Shape resource to function. Give it a CapsuleShape2D resource and set the Radius and Height to 5 px and 12 px. The shape will not be visible during gameplay.
AnimatedSprite2D
The last node we’ll add is an AnimatedSprite2D. This will be the actual visible and animated representation of our character. Expand the Animation tab in the inspector and give it a new SpriteFrames resource.
Download this image and save it as “res://player/player.png”. Each row in this sprite sheet corresponds to a different action the character can display. Each action has two frames of animation in 3 directions: Down, Side, and Up. The sixth row, used for jumping and falling, has three frames of animations in two directions. We will only use the first row today.
![]()
Rename the “default” animation to “WalkDown”. Set the FPS to 10. Press the button labeled Add frames from sprite sheet (Ctrl+Shift+O) and select the player sprite sheet file. Set Horizontal and Vertical to 6 and 6. A grid will appear over the sprite sheet. Select the first two frames in the first row of the sprite sheet. Press Add 2 Frame(s).
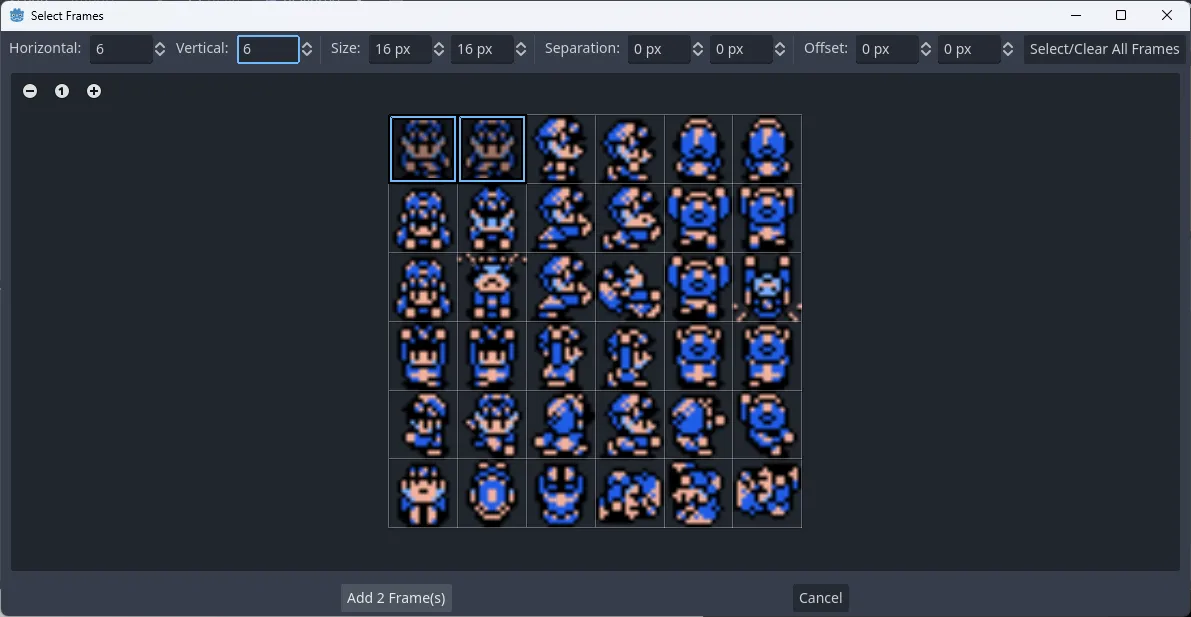
Follow the same steps for the “WalkSide” and “WalkUp” animations. We’ll use “WalkSide” for both left and right and flip the sprite horizontally when the player is moving left. Select “WalkDown” before proceeding to set it as the default animation.
![]()
Script
Add a script to the player scene. Leave the template blank and save it as “player.gd” in the default directory. First we’ll add our variables.
The SPEED constant is how many pixels per second the player will move.
The input_direction variable will be a Vector2 that is mapped to the arrow keys.
The sprite_direction will be a string of the direction the player is facing.
The sprite onready variable is a reference to our AnimatedSprite2D node.
extends CharacterBody2D

const SPEED = 70

var input_direction
var sprite_direction

@onready var sprite = $AnimatedSprite2D
Input Direction
Create a getter function for input_direction. It will check for keyboard inputs and return a Vector2. Name it _get_input_direction.
Let’s create a local x variable that will be set to the combined presses of “ui_left” and “ui_right”. We convert them from bool to int and negate “ui_left”. If the left arrow key is pressed x will be -1, if right is pressed it will be 1. The ints are added together so if both keys are pressed x cancels to 0.
Do the same with a new y variable using “ui_up” and “ui_down”.
Set input_direction to a normalized Vector2 composed of x and y then return it.
func _get_input_direction():
	var x = -int(Input.is_action_pressed("ui_left")) + int(Input.is_action_pressed("ui_right"))
	var y = -int(Input.is_action_pressed("ui_up")) + int(Input.is_action_pressed("ui_down"))
	input_direction = Vector2(x,y).normalized()
	return input_direction
Add the get keyword to our input_direction declaration and the function will automatically update its value when we ask for it.
var input_direction: get = _get_input_direction
var sprite_direction
Movement
Now we can move the body. We’ll create the _physics_process above our other function and make use of input_direction. Set velocity to input_direction * SPEED and call move_and_slide. velocity is a built-in property of CharacterBody2D that is automatically used and updated when the node moves.
func _physics_process(_delta):
	velocity = input_direction * SPEED
	move_and_slide()
Add an instance of our player scene to the main scene we created earlier. Hit F5 and set “main.tscn” as the main scene. You can move the player with the arrow keys. Try moving diagonally or holding opposite directions at the same time.
Sprite Direction
Now we need to know what direction the player has moved last so we can play the correct animation later.
Create a new function named _get_sprite_direction under _get_input_direction. We’ll use a match statement that will take an orthogonal direction and return it as a string in sprite_direction.
func _get_sprite_direction():
	match input_direction:
		Vector2.LEFT:
			sprite_direction = "Left"
		Vector2.RIGHT:
			sprite_direction = "Right"
		Vector2.UP:
			sprite_direction = "Up"
		Vector2.DOWN:
			sprite_direction = "Down"
	return sprite_direction
Define this as sprite_direction’s getter function. Set its default value to “Down”.
var input_direction: get = _get_input_direction
var sprite_direction = "Down": get = _get_sprite_direction
Animation
Create a set_animation function that accepts an animation parameter. It will take an animation set such as “Walk” or later “Push” and “Carry” and play the correct animation depending on the player’s direction.
Create a direction variable and set it to “Side” if sprite_direction is either “Left” or “Right”. If it is “Up” or “Down” then direction can be the same. We use a ternary-if expression to accomplish this in a single line.
Next have our sprite node play animation + direction. We can use the + operator on two strings to concatenate them. If the up arrow key is being pressed it will play “WalkUp”.
Finally we will set the flip_h property in sprite to the expression sprite_direction == "Left".
func set_animation(animation):
	var direction = "Side" if sprite_direction in ["Left", "Right"] else sprite_direction
	sprite.play(animation + direction)
	sprite.flip_h = (sprite_direction == "Left")
Now in _physics_process we’ll set the animation to “Walk” and stop the sprite if the player isn’t moving.
func _physics_process(_delta):
	velocity = input_direction * SPEED
	move_and_slide()

	set_animation("Walk")
	if velocity == Vector2.ZERO:
		sprite.stop()
Conclusion
That’s all we’re going to do for this one. Here is the full “player.gd” script:
extends CharacterBody2D

const SPEED = 70

var input_direction: get = _get_input_direction
var sprite_direction = "Down": get = _get_sprite_direction

@onready var sprite = $AnimatedSprite2D


func _physics_process(_delta):
	velocity = input_direction * SPEED
	move_and_slide()

	set_animation("Walk")
	if velocity == Vector2.ZERO:
		sprite.stop()


func set_animation(animation):
	var direction = "Side" if sprite_direction in ["Left", "Right"] else sprite_direction
	sprite.play(animation + direction)
	sprite.flip_h = (sprite_direction == "Left")


func _get_input_direction():
	var x = -int(Input.is_action_pressed("ui_left")) + int(Input.is_action_pressed("ui_right"))
	var y = -int(Input.is_action_pressed("ui_up")) + int(Input.is_action_pressed("ui_down"))
	input_direction = Vector2(x,y).normalized()
	return input_direction


func _get_sprite_direction():
	match input_direction:
		Vector2.LEFT:
			sprite_direction = "Left"
		Vector2.RIGHT:
			sprite_direction = "Right"
		Vector2.UP:
			sprite_direction = "Up"
		Vector2.DOWN:
			sprite_direction = "Down"
	return sprite_direction
Thanks so much for reading! If you need any further assistance, feel free to reach out on Discord.